Learn How To Speed Up Your NextJS NFT Sites (Part 1)
Part 1 will cover some of the easy wins of NextJS sites while Part 2 will cover more in-depth topics like Dynamic Imports and Web 3 packages.
Working in the new and innovative Web 3.0 space has tons of benefits and pitfalls. While it's a fun industry to be in, we've noticed that there are a ton of NFT minting DApps and whole websites built with NextJS that don't meet everyday expectations for modern website speed.
These slow websites can be caused by a large number of reasons, this post will point out many of the common problems we see and address how we can fix them to better improve the experience of moving our internet from Web 2.0 to Web 3.0.
If you like this post be sure to share it with your dev friends.
Let's jump right in!
Prerequisites
It's assumed that you are familiar with modern web development and component-based website creation (think react framework). If you're stumbling on this and you are a project manager make sure to share this with your web developer 😊.
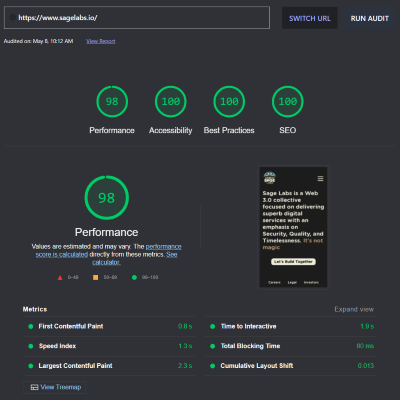
You can test your website with the free tools offered on web.dev and pagespeed
Common problems
Here's a simple list of what we'll be discussing in part 1.
- Using Next/Image
- Incorrect image sizes
- Legacy image formats (.png and .jpg vs .webp)
- Cleaning up imports
- Using Preact
Let's start with the easy stuff
Using Next/Image
One of the easiest changes you can make is to swap your <img /> tag with an <Image />.
If you aren't familiar with 'next/image' it has a couple optimizations under the hood. We won't go over them here, but one worth noting is that these images are cached after the first load. This doesn't directly affect any stats on like First Contentful Paint, but it helps the user experience by preventing a fresh image fetch after it's already been grabbed by the client.
*Read more on next/image here
Changing from an <img /> to an <Image /> is pretty straightforward. Pay close attention to your styling though, Images are internally wrapped in a div which can throw some things off.
Here's an example of how you can swap your code over to <Image />:
🛑Bad
// Imports

const myImageInABox = () => {
    return (
        <div className='my-styles'>
            <img src='/myImage.png' width={50} height={50} alt='my demo image' />
        </div>
    );
}

export default myImageInABox;
simply import 'next/image' at the top and use it in place of the <img />
✅Good
import Image from "next/image";

const myImageInABox = () => {
    return (
        <div className='my-styles'>
            <Image src='/myImage.png' width={50} height={50} alt='my demo image' />
        </div>
    );
}

export default myImageInABox;
Image sizing
 Let's face it, most NFT DApps are built around selling images. That means these sites are usually pulling in a few, if not many, different image files. As most web developers know, images are relatively large files; these images must be cropped or sized to fit the dimensions specified in your code. No compression magic can speed up painting a 500x500 px image that's actually 10,000x10,000 px (yes, we've seen this on websites).
Properly sized images will likely have one of the biggest impacts on your website speed.
It's simple. If you have an image like this
example:
<Image src={person.image} height={200} width={200} alt={person.name} />
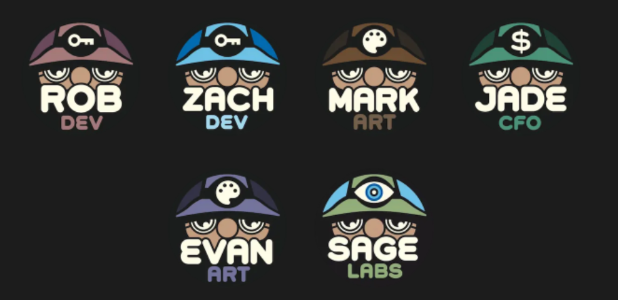
Make sure that the image itself is actually 200x200. Our team pictures here are all originally 2000x2000 px in size, but are only displayed as 200x200. By resizing the team images using our computers' built-in resizing tool we can reduce our file size from 155 kb to 20.7 kb, a whopping 86.65% reduction in the file size!
Using modern file formats
To expand on the topic of images, there's another step we can take to further reduce image size. You can convert your .png, .jpg, or whatever other legacy image file to a .webp to shrink it even more. The .webp file type conversion supports both lossless and lossy compression with respective decreases in file size.
We can take our team images from the previous section and convert them to webp format using some free online tools:
- Convertio performs lossless conversion: Convertio
- CloudConvert performs lossy conversion: CloudConvert
Our converted team image goes from 20.7 kb to 8.93 kb, another 56.86% reduction from the previous file size!
To allow .webp to be served by NextJS you'll have to add support in your next.config.js file like this
Example:
module.exports = {
  // other settings
  images: {
    formats: ['image/webp']
  }
}
Cleaning up imports
This goes alongside having clean, professional code and is again, very straightforward and fast to do. Go through each of your pages and components and make sure you aren't importing a bunch of unneeded dependencies.
If you're using VS Code for your IDE you have the benefit of visually grayed out imports that are never used. If you're in the production stage you can safely remove these unused imports. You can optionally install the extension Import Cost to get a nice visualization of how heavy some imports are.
Using Preact
We're new to Preact and just starting to integrate it into our builds. Nonetheless, this tip is suitable for most projects and drastically improves performance.
Make sure your app is suited for preact. Check out the differences listed on their site to verify your website won't lose functionality in this transition
- Check out their docs: Differences to React
Preact is a lightweight alternative to React that is optimized out of the box. While it's fairly common, we don't see it used much in the NFT space. Preact features, alongside other things, a virtual dom that differs from the react-dom used typical by react apps. The whole Preact package is only 3kb in size as compared to the over 100 kb react package. Setting this up for your NextJS app is very easy.
First, install the preact packages like this:
// with npm
npm install preact

// with yarn
yarn add preact
Then change your next.config.js file to use it.
Example with webpack:
module.exports = {
  webpack: (config, { dev, isServer }) => {
    if (!dev && !isServer) {
      Object.assign(config.resolve.alias, {
        react: 'preact/compat',
        'react-dom/test-utils': 'preact/test-utils',
        'react-dom': 'preact/compat',
      })
    }
    return config
  },
  images: {
    formats: ['image/webp']
  }
}
Conclusion
Using next/image allows for cached images to be displayed again without refetching. This, alongside images that are properly sized and in modern formats, can drastically reduce the size of the files your site is pulling in. Paired with clean code imports and a smaller react alternative we can further shrink the dependencies our site is using. The above tips should provide a solid improvement on your site speed if you don't have them implemented yet. Hopefully, you found this post helpful. Stick around for Part 2 coming soon!
If you have any questions or want to reach out feel free to fill out the Contact form here